sudo apt-get install -y nodejs
を見ながら
$ curl -sL https://deb.nodesource.com/setup | sudo bash –
$ sudo apt-get install -y nodejs
確認
$ node -v
v0.11.13
$ npm -v
1.4.9
なんか古いですね..
とりあえず急場はこれでしのぎました
sudo apt-get install -y nodejs
を見ながら
$ curl -sL https://deb.nodesource.com/setup | sudo bash –
$ sudo apt-get install -y nodejs
確認
$ node -v
v0.11.13
$ npm -v
1.4.9
なんか古いですね..
とりあえず急場はこれでしのぎました
Railsのデータベースをsqlite3からpostgresqlに変更してみました
postgresqlはインストールして、Rails用のユーザーを作っておきます
Gemfileを変更します
-gem ‘sqlite3’
+gem ‘pg’
sqlite3の代わりにpgに変更
データベース設定ファイルを修正
config/database.yml
default: &default
  adapter: postgresql
  encoding: utf8
  reconnect: false
  pool: 5
  username: root
  password: root
  host: localhost

development:
  <<: *default
  database: sample_dev

test:
  <<: *default
  database: sample_test

production:
  <<: *default
  database: sample
というふうにpostgresql用に変更
データベース作成
$ rake db:create
$ rake db:migrate
でできあがり
herokuにrailsアプリ手順をおさらい
heroku toolbeltはインストール済みです
railsアプリのディレクトリへ移動します
git管理してなければ
$ git init
$ git add -A
$ git commit -m ‘initial’
とかでGit管理しておきます
$ heroku login
でherokuに一度ログインしていおきます
$ heroku create
でherokuアプリを生成
herokuにアプリをプッシュします
$ git push heroku master
これでデプロイできました
postgresqlを使っていたため
$ heroku addons:add heroku-postgresql
データベース用意
$ heroku run rake db:migrate
アクセスしてみます
$ heroku open
でherokuのアドレスをブラウザで開いたり
$ heroku info
=== xxxxxxx-yyyyy-1111
Dynos:         0
Git URL:       https://git.heroku.com/xxxxxxx-yyyyy-1111.git
Owner Email:   sample@sample.com
Region:        us
Stack:         cedar-14
Web URL:       https://xxxxxxx-yyyyy-1111.herokuapp.com/
Workers:       0
とURLが見れたりします
ひさしぶりにawsのダッシュボードにアクセスしたら、ダッシュボードが英語に..
慣れないので英語に..と思ったら迷ったのでメモ
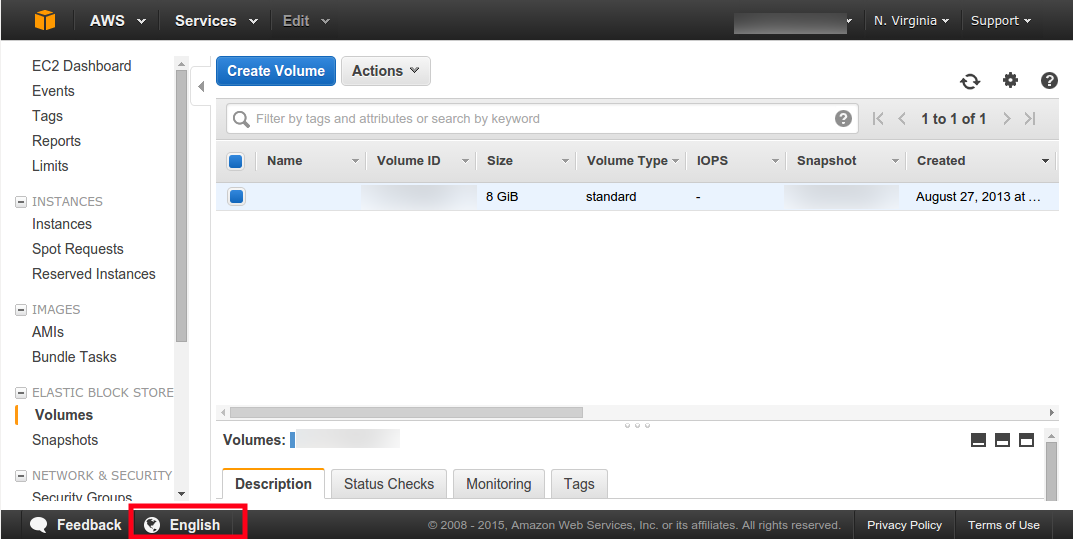
普通に左下にありました..
設定メニューがあると思って探しました